
This weekly post will be dedicated to learning how to make basic mosaics. Come along with me as I show you how easy and fun it can be.
In this post I've shared the way to make two 4 inch coasters from start to finish using glass and vitreous tiles. It also shows how to grout. The posts following these will show only the techniques on how to mosaic and not grouting information. You can refer to this post any time to refresh your memory on how it is done.
For this project you will need:
- Glass and/or vitreous tiles (I recommend both)
- PVA glue
- Paint brush
- Water
- 2 MDF or wooden coasters
- Sanded grout
- Gloves
- Dust mask
- Wooden craft stick
- Newspaper or plastic
- Clean, dry rags
- Glass nippers (optional)
- Acrylic paint (optional)
- Painters tape (optional)
- Felt pads (optional)
- String or ribbon (optional)
Art Level: Beginner
Difficulty: Easy
We'll first start off with some basic information before getting down to the "good stuff".
Terms often used when creating mosaics:
Substrate: The base or backing for a mosaic. This is generally what the tesserae are stuck to.

Tesserae: The plural of "tessera", a name given to pieces used in a mosaic. Originally tesserae were the cubes of stone used in ancient classical mosaics, but now the term is used for pieces of any kind of mosaic material, whether they are ceramic, stone, pebbles, glass or some other substance.

Pique assiette: Pique assiette is a style of mosaic that incorporates pieces of broken ceramics - plates, dishes, cups, tiles - and other found objects into the design. The longer answer, to think about the appeal and expressiveness of pique assiette, must take in ideas of lateral thinking, humor, the art of recycling, and the significance of found objects.

______
The above information was found at The Joy of Shards website. This website has definitions/descriptions on all things relating to mosaics. If you have the time and are interested, it is well worth taking a look: http://www.thejoyofshards.co.uk/glossary/index.shtml
********
Websites for supplies:
MDF Coasters: I buy them through amazon.com. You can get Darice DIY Crafts Coaster Set MDF Square 6 pack 4 x 4 inches (3-Pack) at a very reasonable price. There's a good possibility you can find the exact same thing in your local crafts store!
Glue: I've gotten all kinds of glue over the years and my favorite is Aleene's Original Tacky Glue. You can find this almost everywhere. All crafts stores carry it and you can order it online in many places. The link I share here is from Michaels. This is water-based PVA (Polyvinyl acetate) glue, not recommended for outdoor projects. When wet it is white, but it dries clear. When mixed with water, it works well as a primer for this kind of project (see photos below).
Glass and Vitreous Tiles: I always get these online through the following distributors. Craft stores carry them too but I recommend, if you have the time, to order them online. You'll have a better selection and often find some really great deals.
There are many places to purchase these but here are a few to get you started:
Tools: I purchase my glass cutting tools online to get the best I possibly can because I use them all the time. You can find those here:
https://www.witsendmosaic.com/product/108/LEPONITT-G30C-Wheeled-Nippers
They look like this:

If you are just toying with the idea of making mosaics and aren't sure you want to invest in a lot of supplies, your nearest DIY or craft store carry glass nippers. You don't need a glass cutter for this project.
********
Let's get started!
1) It's always a good idea to prime your substrate before you begin working on it. You can get primer paint at your local DIY store such as Kilz however if you're only doing small pieces or just not sure you'll be making a lot of mosaics, using the glue/water wash method works really well.
The following photos show you how it's done. We recommend a ratio of 3:1 (glue:water).


Paint the wash on generously and allow to dry. Depending on the weather depends on the drying time. For us here in PA in June, it takes about a 1/2 hour to dry.
Now you can start making your mosaic! Woohoo!!!
Please note: If children are going to be doing this project, and I highly recommend they give it a try (my grandson loves making these), make sure they handle the pieces carefully. Even though tiles are less likely to be sharp, they are made of glass. Just keep that in mind and you will be fine.
2) Gather up your tiles and decide on a design. I like to do an abstract design, fitting in the pieces as I go to fill up the coaster. You can draw a simple design on the coaster if you'd like.
 |
| Add a little glue and start putting the tiles down. You have a little leeway with this glue to pick up the pieces and maneuver them. |
 |
| Lots of beautiful colored tiles from years of collecting! Aren't they pretty? |
 |
| Continue to fill up the coaster with glue and tiles. |
 |
| This coaster required a few tile pieces to be cut using nippers. |
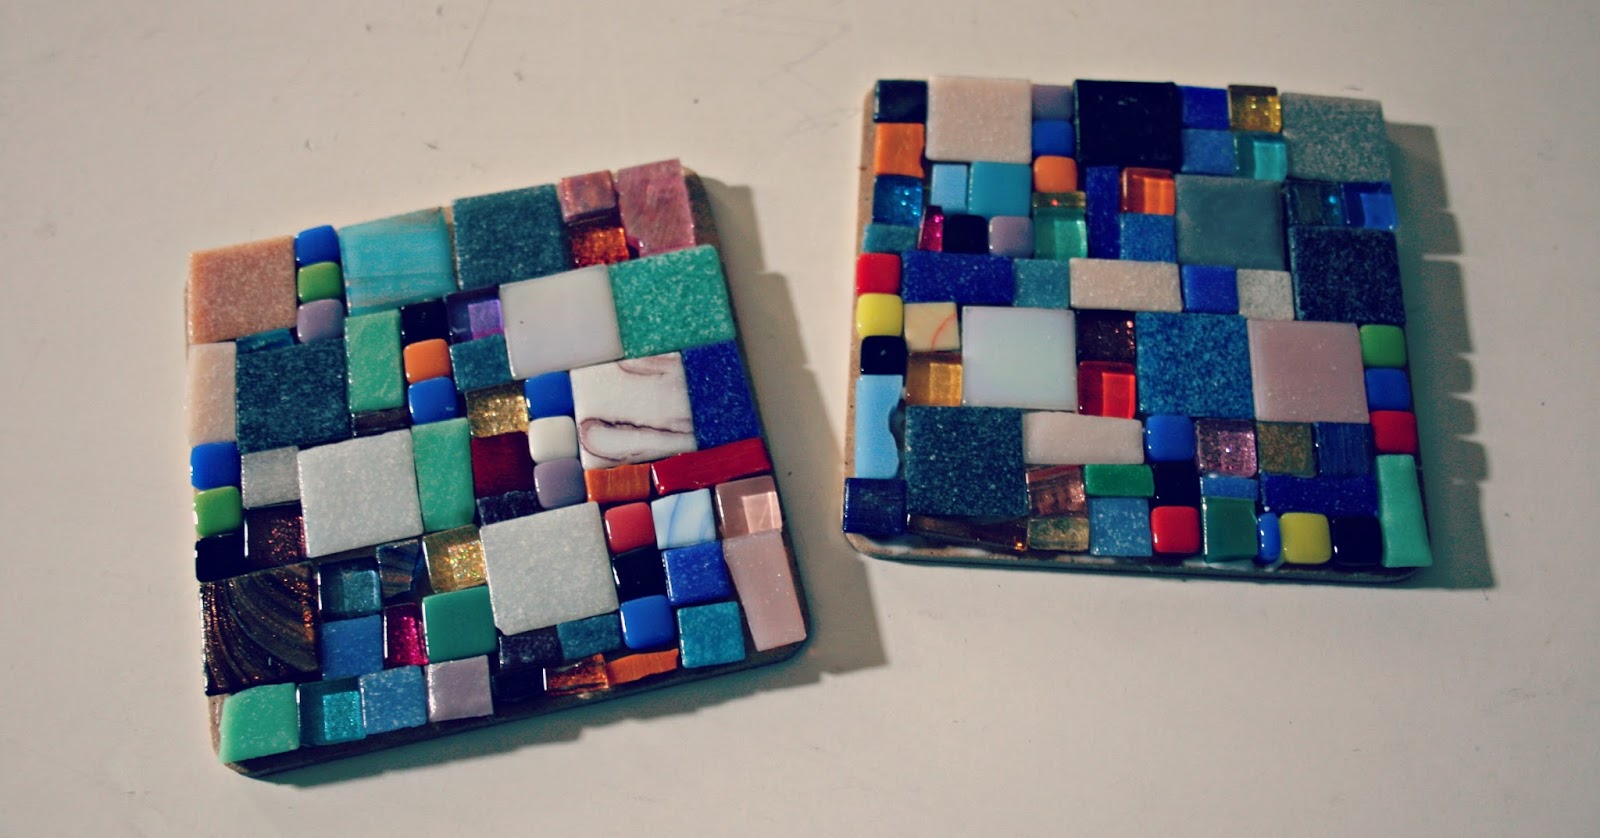 |
| All finished and ready for the next step! |
 |
| I painted the back of each coaster before grouting them. You can leave them as they are or paint them after you grout. It's entirely your choice. |
3) Let the coaster(s) sit for at least 24 hours before grouting.
Now let's grout!
I use sanded grout that I get from our local DIY store. For these coasters, I'm going to use a tan colored grout.
Besides grout and water, you will need:
- A container with which to mix grout and water.
- A wooden craft stick or other stirring device.
- Gloves.
- Dust mask (recommended).
- Newspaper or plastic to protect your surface.
Following is a group of photos sharing what I do and how I do it.
 |
| I use sanded grout that I get from my favorite DIY store, an old plastic container, frozen pop sticks, water and a plastic grocery bag. |
 |
| To prevent grout from getting all over the back of my mosaics, I use painters tape to cover. This is only really necessary if you are a bit sloppy (like me) or letting children have some grouting fun. |
 |
| Put on the dust mask and mix the grout. This photo shows the consistency of grout and water. The stick is standing up on its own. You need to let the grout slack for 10 minutes. This is usually when I tape the bottom surface of the coasters. When I'm finished, the grout is ready. |
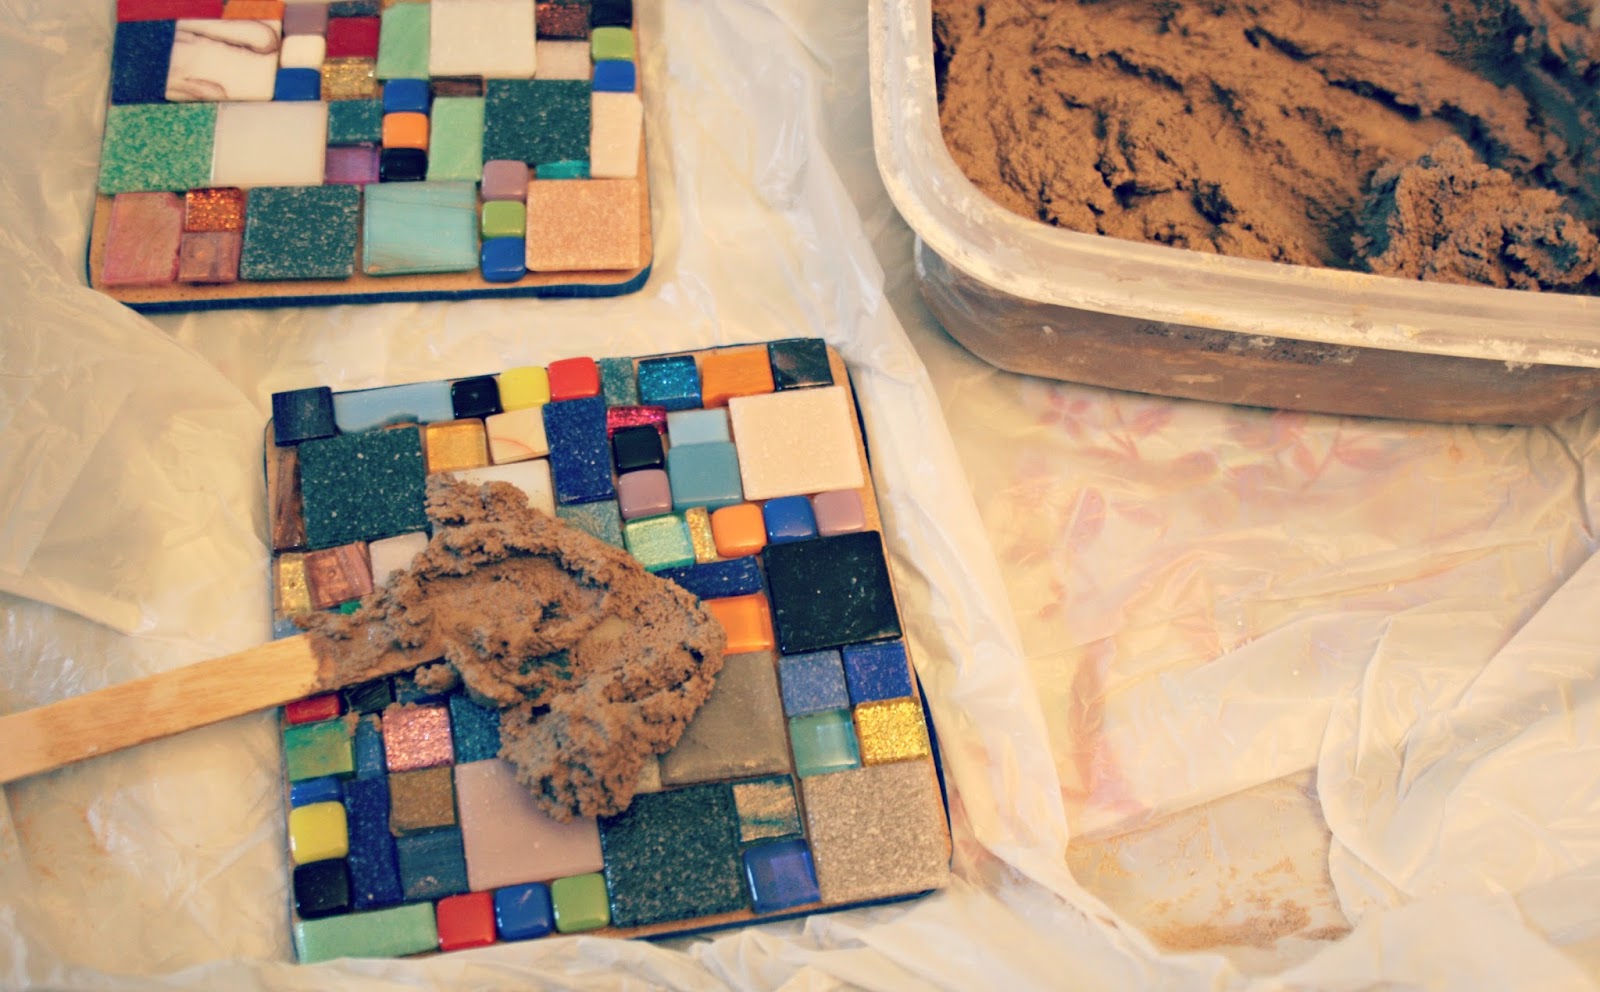 |
| Start adding grout to the mosaic, making sure all the spaces are filled in nicely. |
 |
| Allow the coasters to sit for about 5 minutes after adding the grout. You will see a hazy effect start to happen as the grout dries. Don't panic!! That's a good thing! |
 |
| When the haze happens it means it's almost time to start cleaning off the grout. I use dry cloths to wipe the grout off. |
 |
| These are looking good! Ready to start cleaning. |
 | ||
| This is the first initial cleaning off of the grout. I normally wipe my mosaics with dry cloths 2-3 times within an hour. |
 | |
| Once grout is dry, remove the tape. I like to add felt pads to the bottom. |
 |
| Wrap them using twine and give them as gifts for special occasions. |
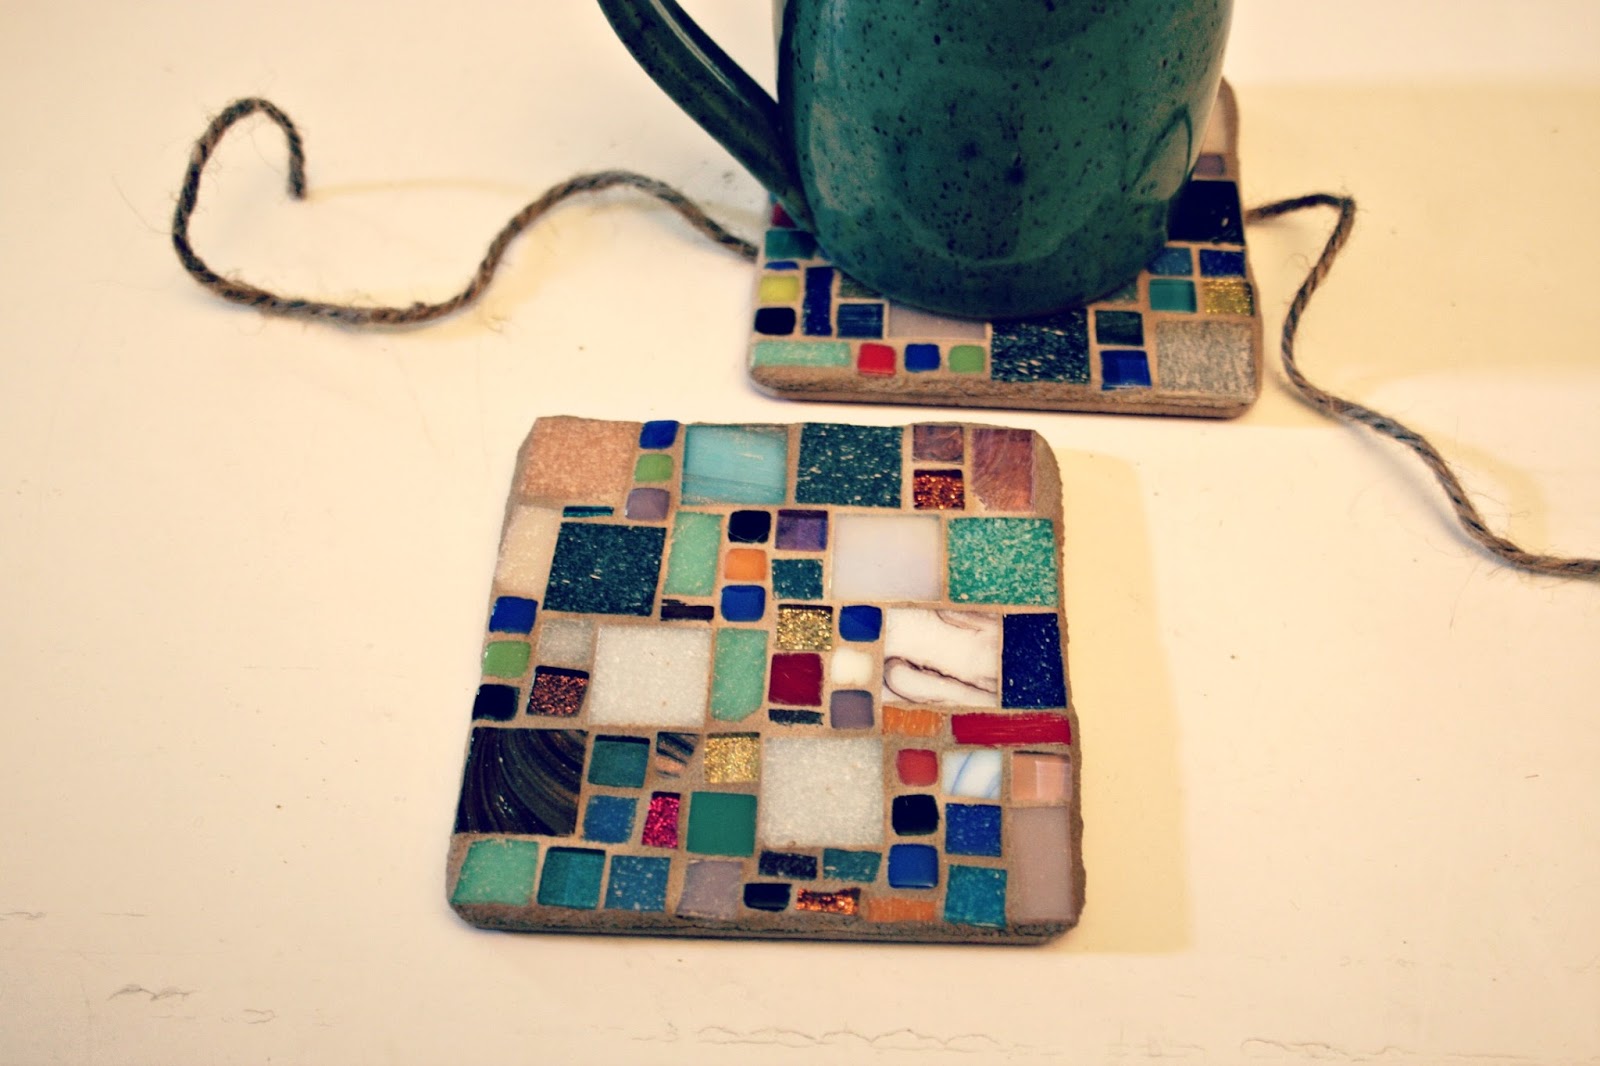 |
| Hey ... they work! Yay!! |
Please note some folks like to use a sealant on their coasters, to protect the grout. You can find sealant in your favorite DIY store. I personally no longer use it due to health issues. I create my mosaics in a small space not conducive to good air flow/circulation. If you use a sealant please follow the directions and always make sure you protect yourself from fumes!
I hope you've enjoyed the first lengthy "How To" installment. If you have any questions about this project or anything I've mentioned here, please let me know. I'll be happy to help.
Part Two's "How To" will show how to use acrylics, glitter and tempered or crash glass to make a mosaic. Again I'll be using coasters because a small piece of art can have a big impact.
I'll also share a few links of people who inspire me and people who share "how to" information that I keep handy for my own use.
Support
Independent Artisans, Designers and Crafters for your gift-giving needs
all throughout the year. Thank you!~Cindy, EarthMotherMosaics
