
The last blog post I wrote was in
October of 2018. A computer crash slowed the process but eventually I
found a laptop did just fine for most things but was a challenge for
blogging. I gave it up for a bit thinking maybe I should just move
on. I missed it sometimes, the people's responses definitely. I had a
small fan base, but I had one. So here we are ... a brand new year and
it's time to share what's been happening in the attic I call home and studio.
I thought I'd share the Christmas gifts
I made over the next few posts. A few have still not been gifted
which means they'll wait to be shared through social media.
This first one, Malachi and Gypsy, was
adapted into mosaic from a favorite photo of mine.

I'm normally leery of doing portraits because they are so precise. However, much to my delight, this particular photo was not as difficult to transfer into mosaic form. I can only assume the spirits that help me in the creative process knew it was time, and gave me permission to use my mosaic magic.
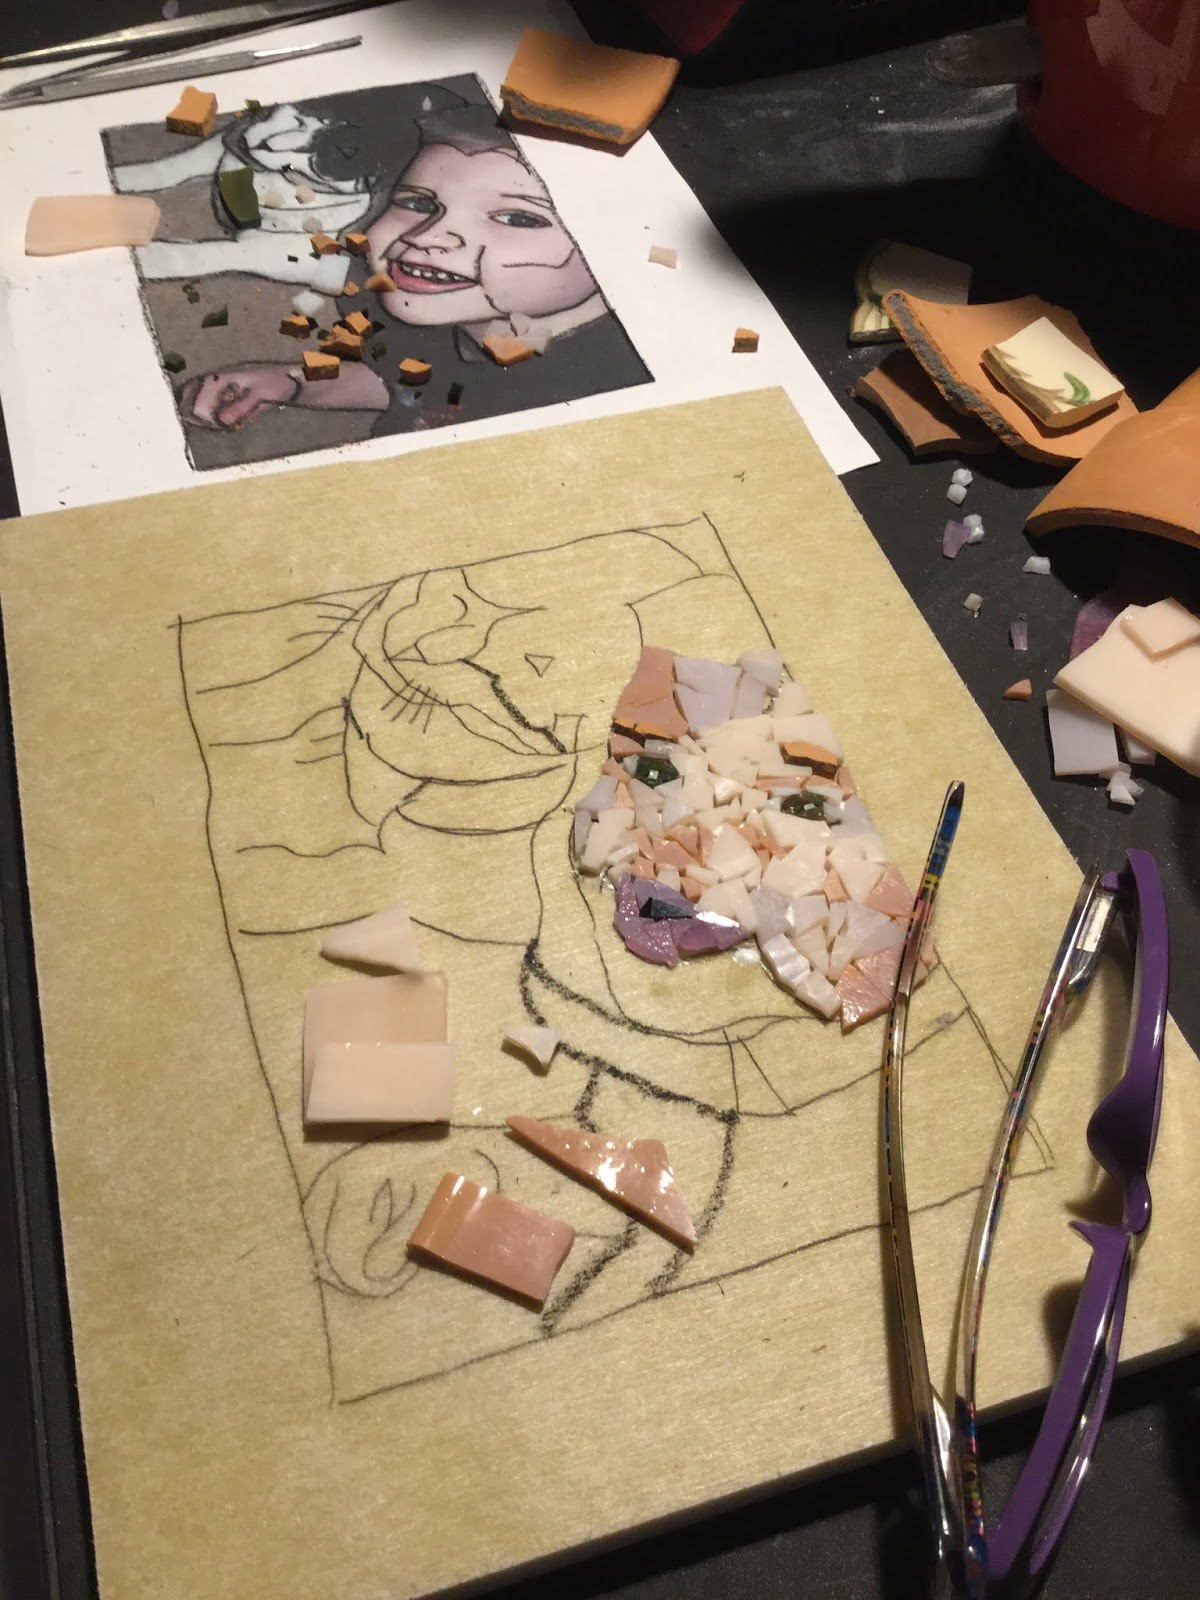
I started by printing out the photo and
tracing it using carbon paper onto the substrate. By the way, these
substrates are fantastic. If you're in the need for easy-to-use and
lightweight boards that are good quality and affordable (and don't leave a mess like
Wediboard does), I highly recommend using these. I'll share the link
at the end of the post for those who are interested.*
After the tracing was finished, the fun
part begins! Adding features in stained glass is not easy. Shading
has become easier, which means I'm learning and reaching the next
plateau. The hardest part was his smile. I couldn't add teeth,
although I did attempt it. I had to change his lips a few times and
lost his smile a little in the end. These two photos show the original set of lips which looked great. In hindsight I should have left them be. That's the only thing I'd try to
change if I were to do it again.

Below, his smile is gone but I didn't really see it until it was completed. I used a few small pieces of a terra cotta pot for his eyebrows. I had dropped a pot and kept the
fragments, knowing I'd use them in something. Viola!

The polka dot pieces are from a broken
dish my daughter had. Since this was going to be her gift, I thought
it would make her happy to see them used in this way.

After the tessera was all glued down,
it was time to grout. Three colors were used, light brown, grey and
black. Using painters tape to cover the mosaic I wasn't grouting as I
added each color was essential. As you can see from the photo of the
taped mosaic, it works well.


Once the mosaic was ready for framing (not yet glued together in the photo below),
I added a peace sign (my signature in 2019) to the bottom right
corner.

It's hanging in their hall where
everyone can see it as they walk through.

*You can find the substrate I used, skeewbacker board, from https://www.skeew.biz
Note: This is not a paid endorsement, this is true love for a great product! ;-) Enjoy!!
Support Independent Artisans, Designers and Crafters for your gift-giving needs all throughout the year. Thank you!~Cindy, EarthMotherMosaics
Support Independent Artisans, Designers and Crafters for your gift-giving needs all throughout the year. Thank you!~Cindy, EarthMotherMosaics

1 comment:
💗😊💗
Post a Comment